eDNA Sampler pump motor replacement procedure
Required Tools & Parts:
- Replacement Kit: Includes motor, foam backing, two bolts, and rubber washers.
- Tools: #2 Phillips screwdriver, 5/16 inch socket and ratchet.
- Test Supplies: Bucket (filled with water), Unit inlet/outlet hoses, factory 12V battery.
- Optional: Zip ties or tape (recommended for securing clear hoses during motor removal).
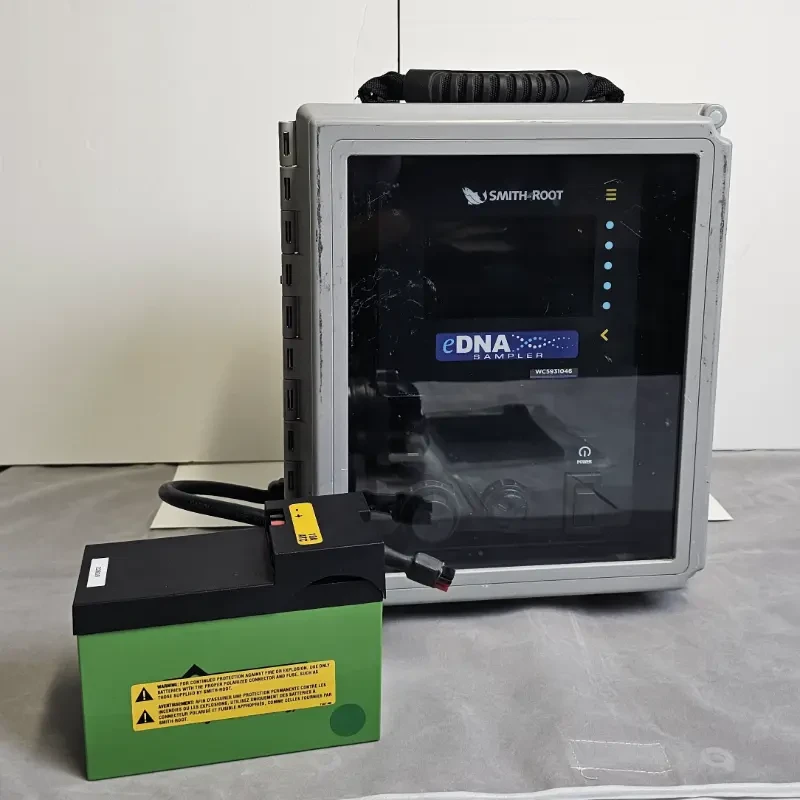
1. Power Down: Ensure the unit is turned off, unplug it from power, and remove the 12V battery from the tray.
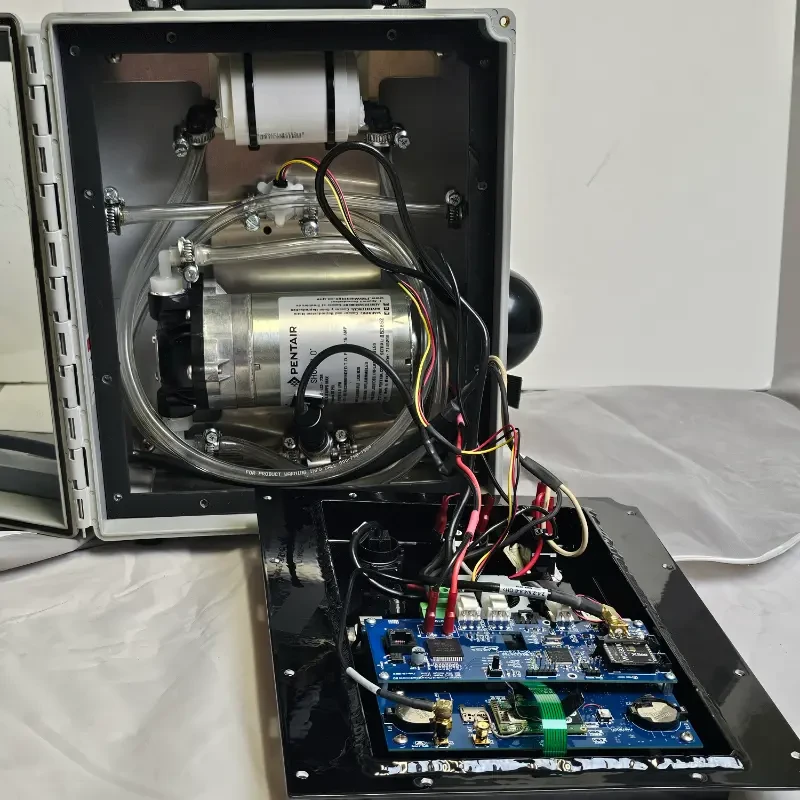
2. Access Interior: Open the door cover and remove the 12 Phillips head screws securing the front panel. Once removed, gently pull the panel forward to separate it from the unit.
* Note: If desired, use zip ties or tape to secure the clear hoses to maintain similar routing during the process.
3. Disconnect Electronics: Disconnect the following electrical connectors (this will allow enough room to perform the procedure):
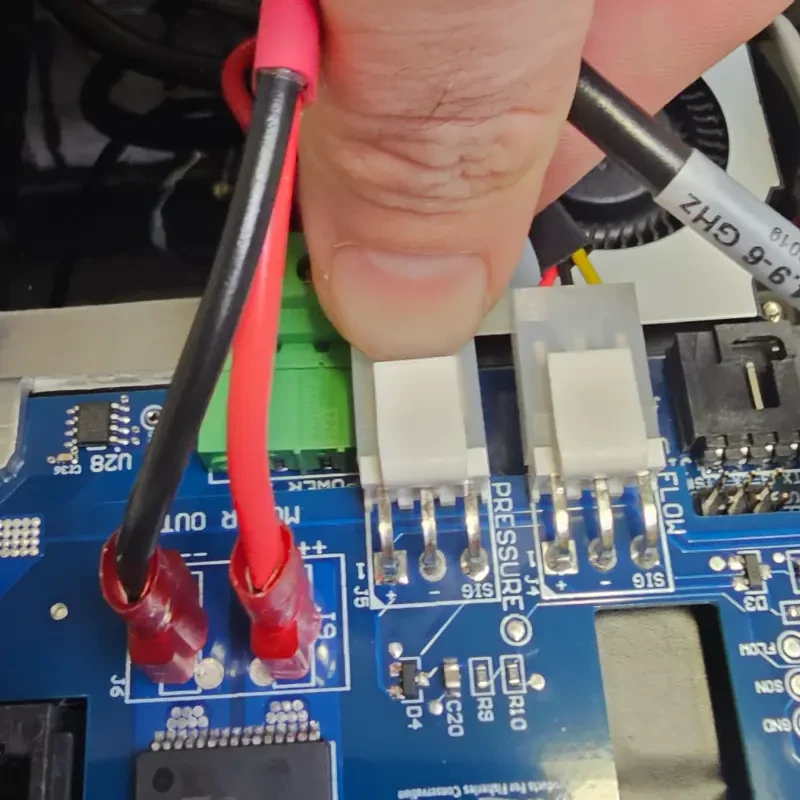
PRESSURE: Gently lift the plastic tab and pull out.
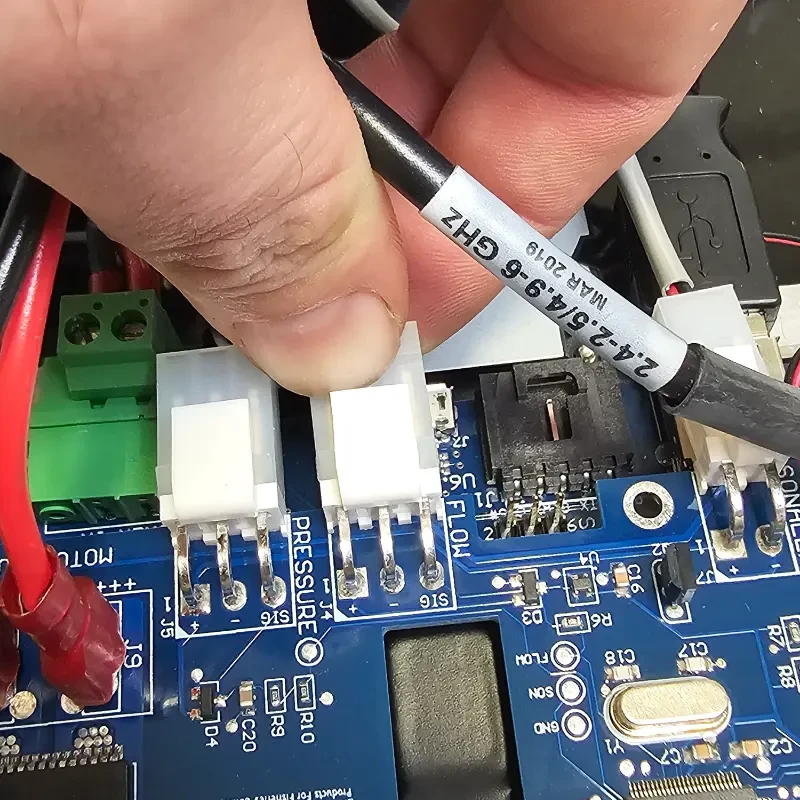
FLOW: Gently lift the plastic tab and pull out (connected to Red/Black/Yellow wires).
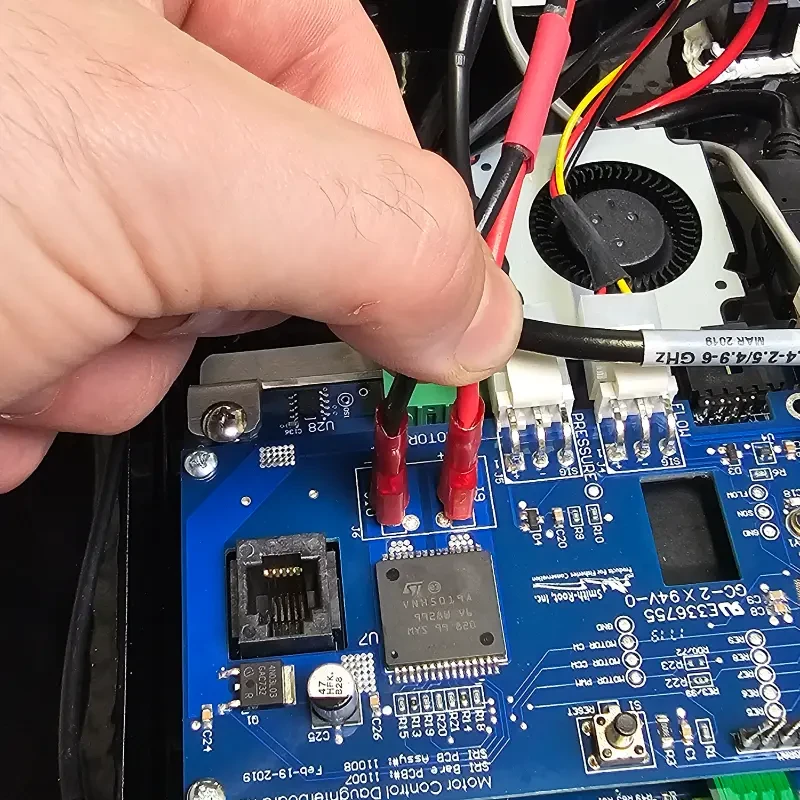
MOTOR (+) and MOTOR (-): Gently wiggle and pull upward to remove.
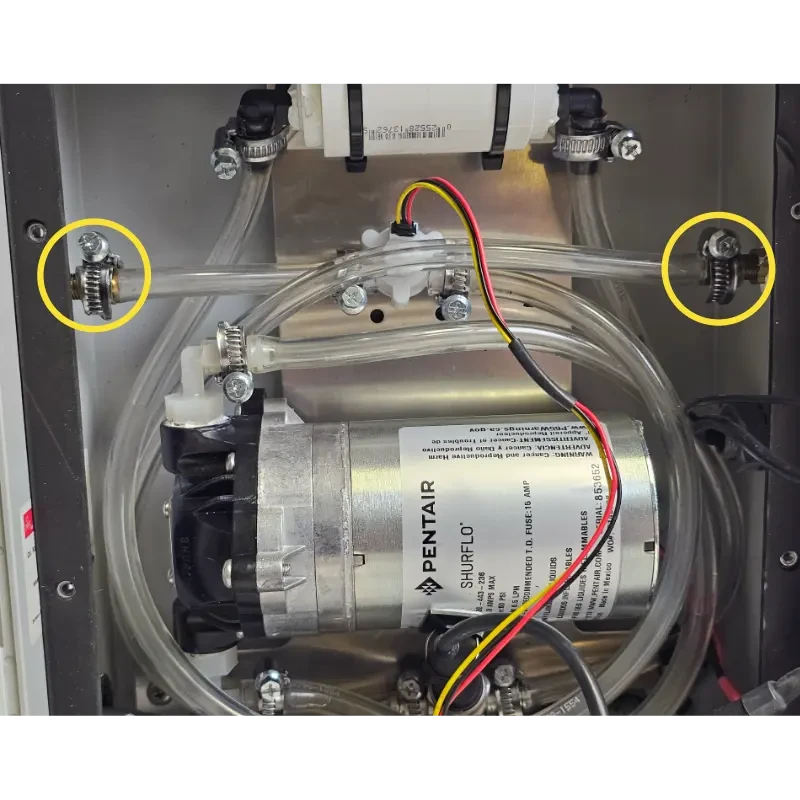
4. Remove Hoses: Loosen the inlet and outlet hose clamps (highlighted in yellow) using a Phillips screwdriver. Once loose, gently pull the hoses off the metal barbs.
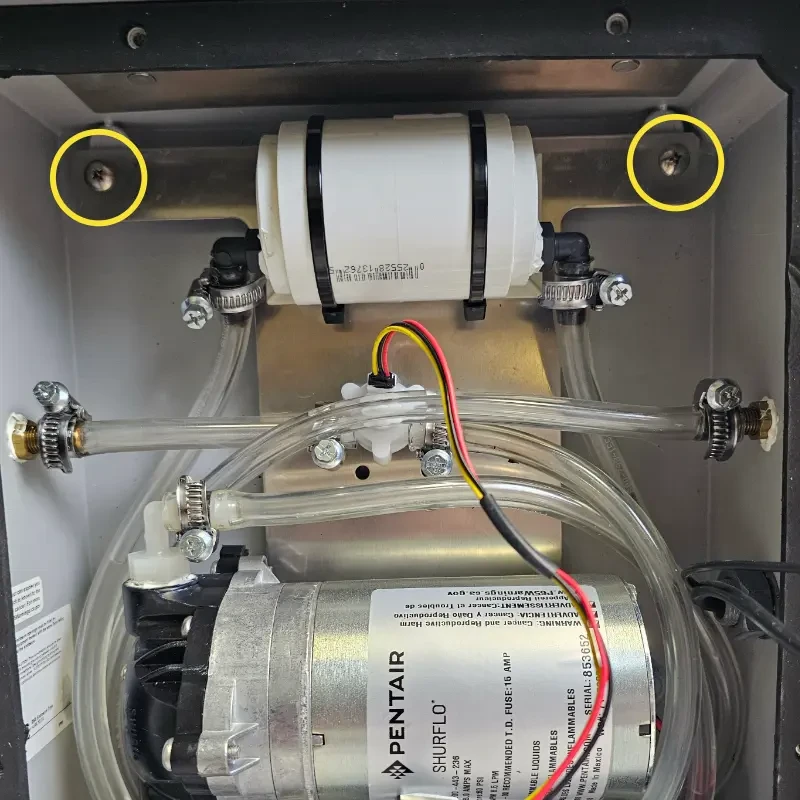
5. Detach Motor Mount: Loosen and remove the 2 upper corner screws securing the motor mount to the unit.
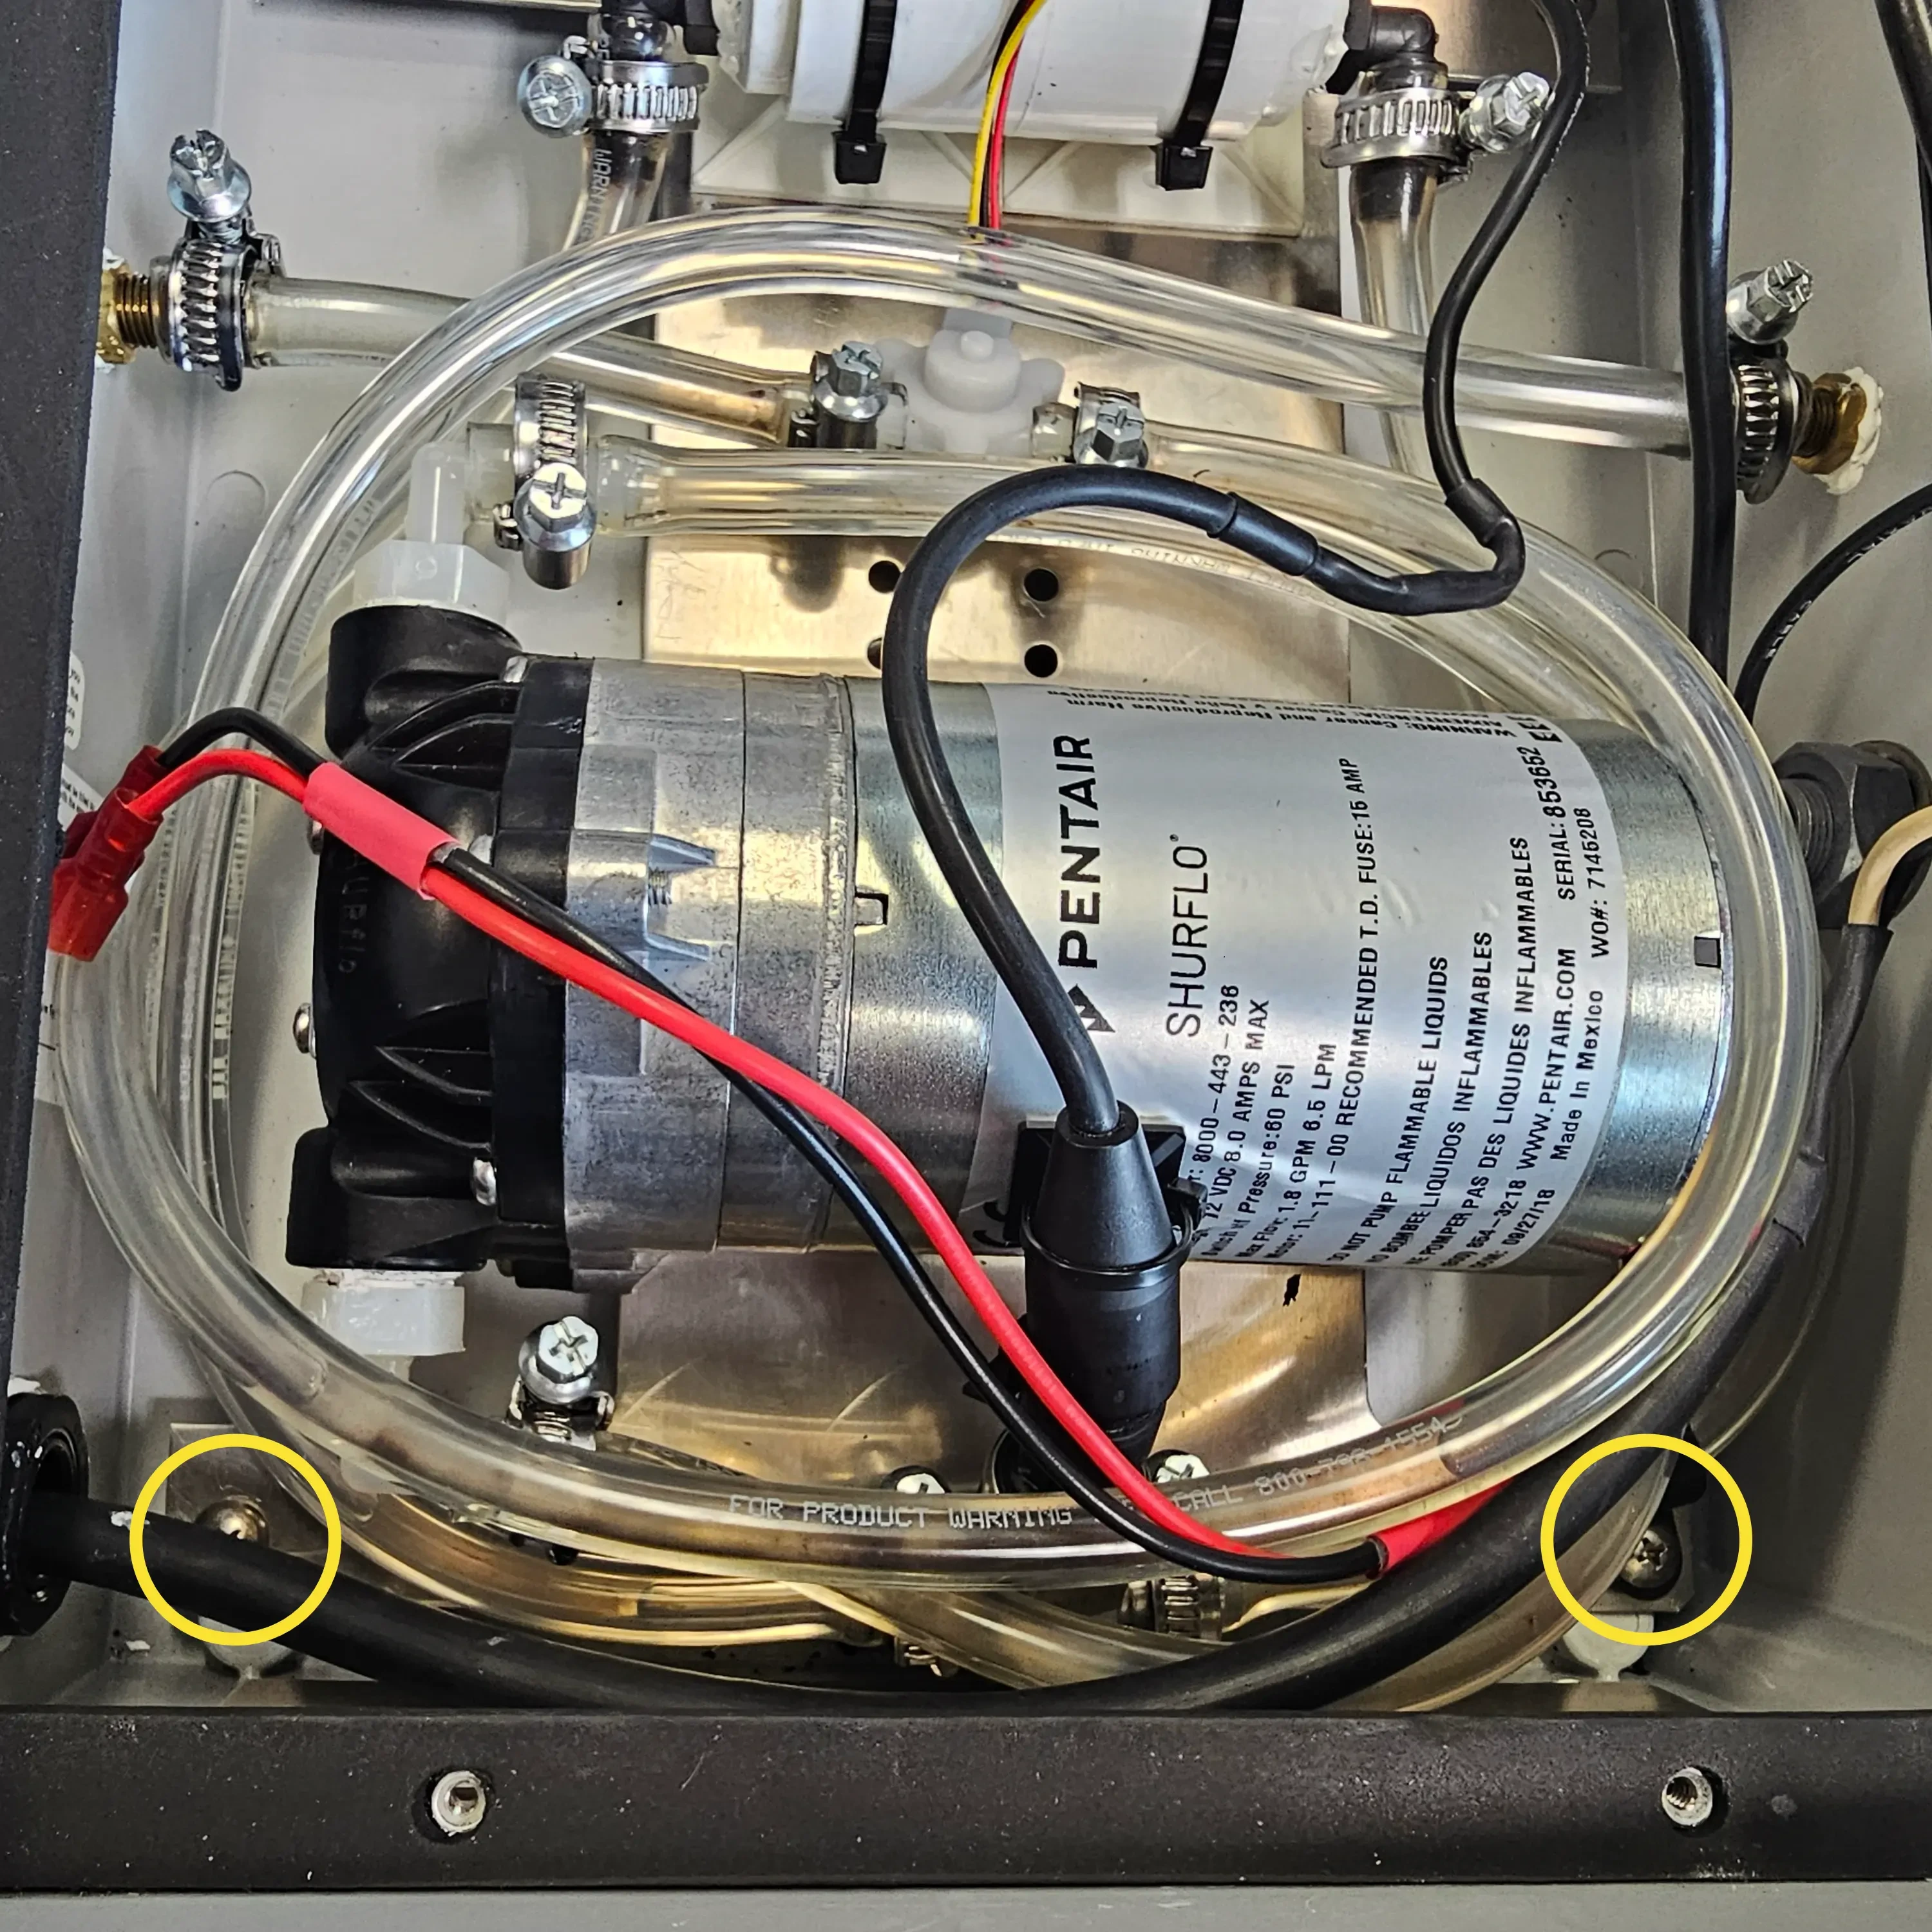
6. Continue Detaching Motor Mount: Loosen and remove 2 lower corner screws securing the motor mount to the unit.
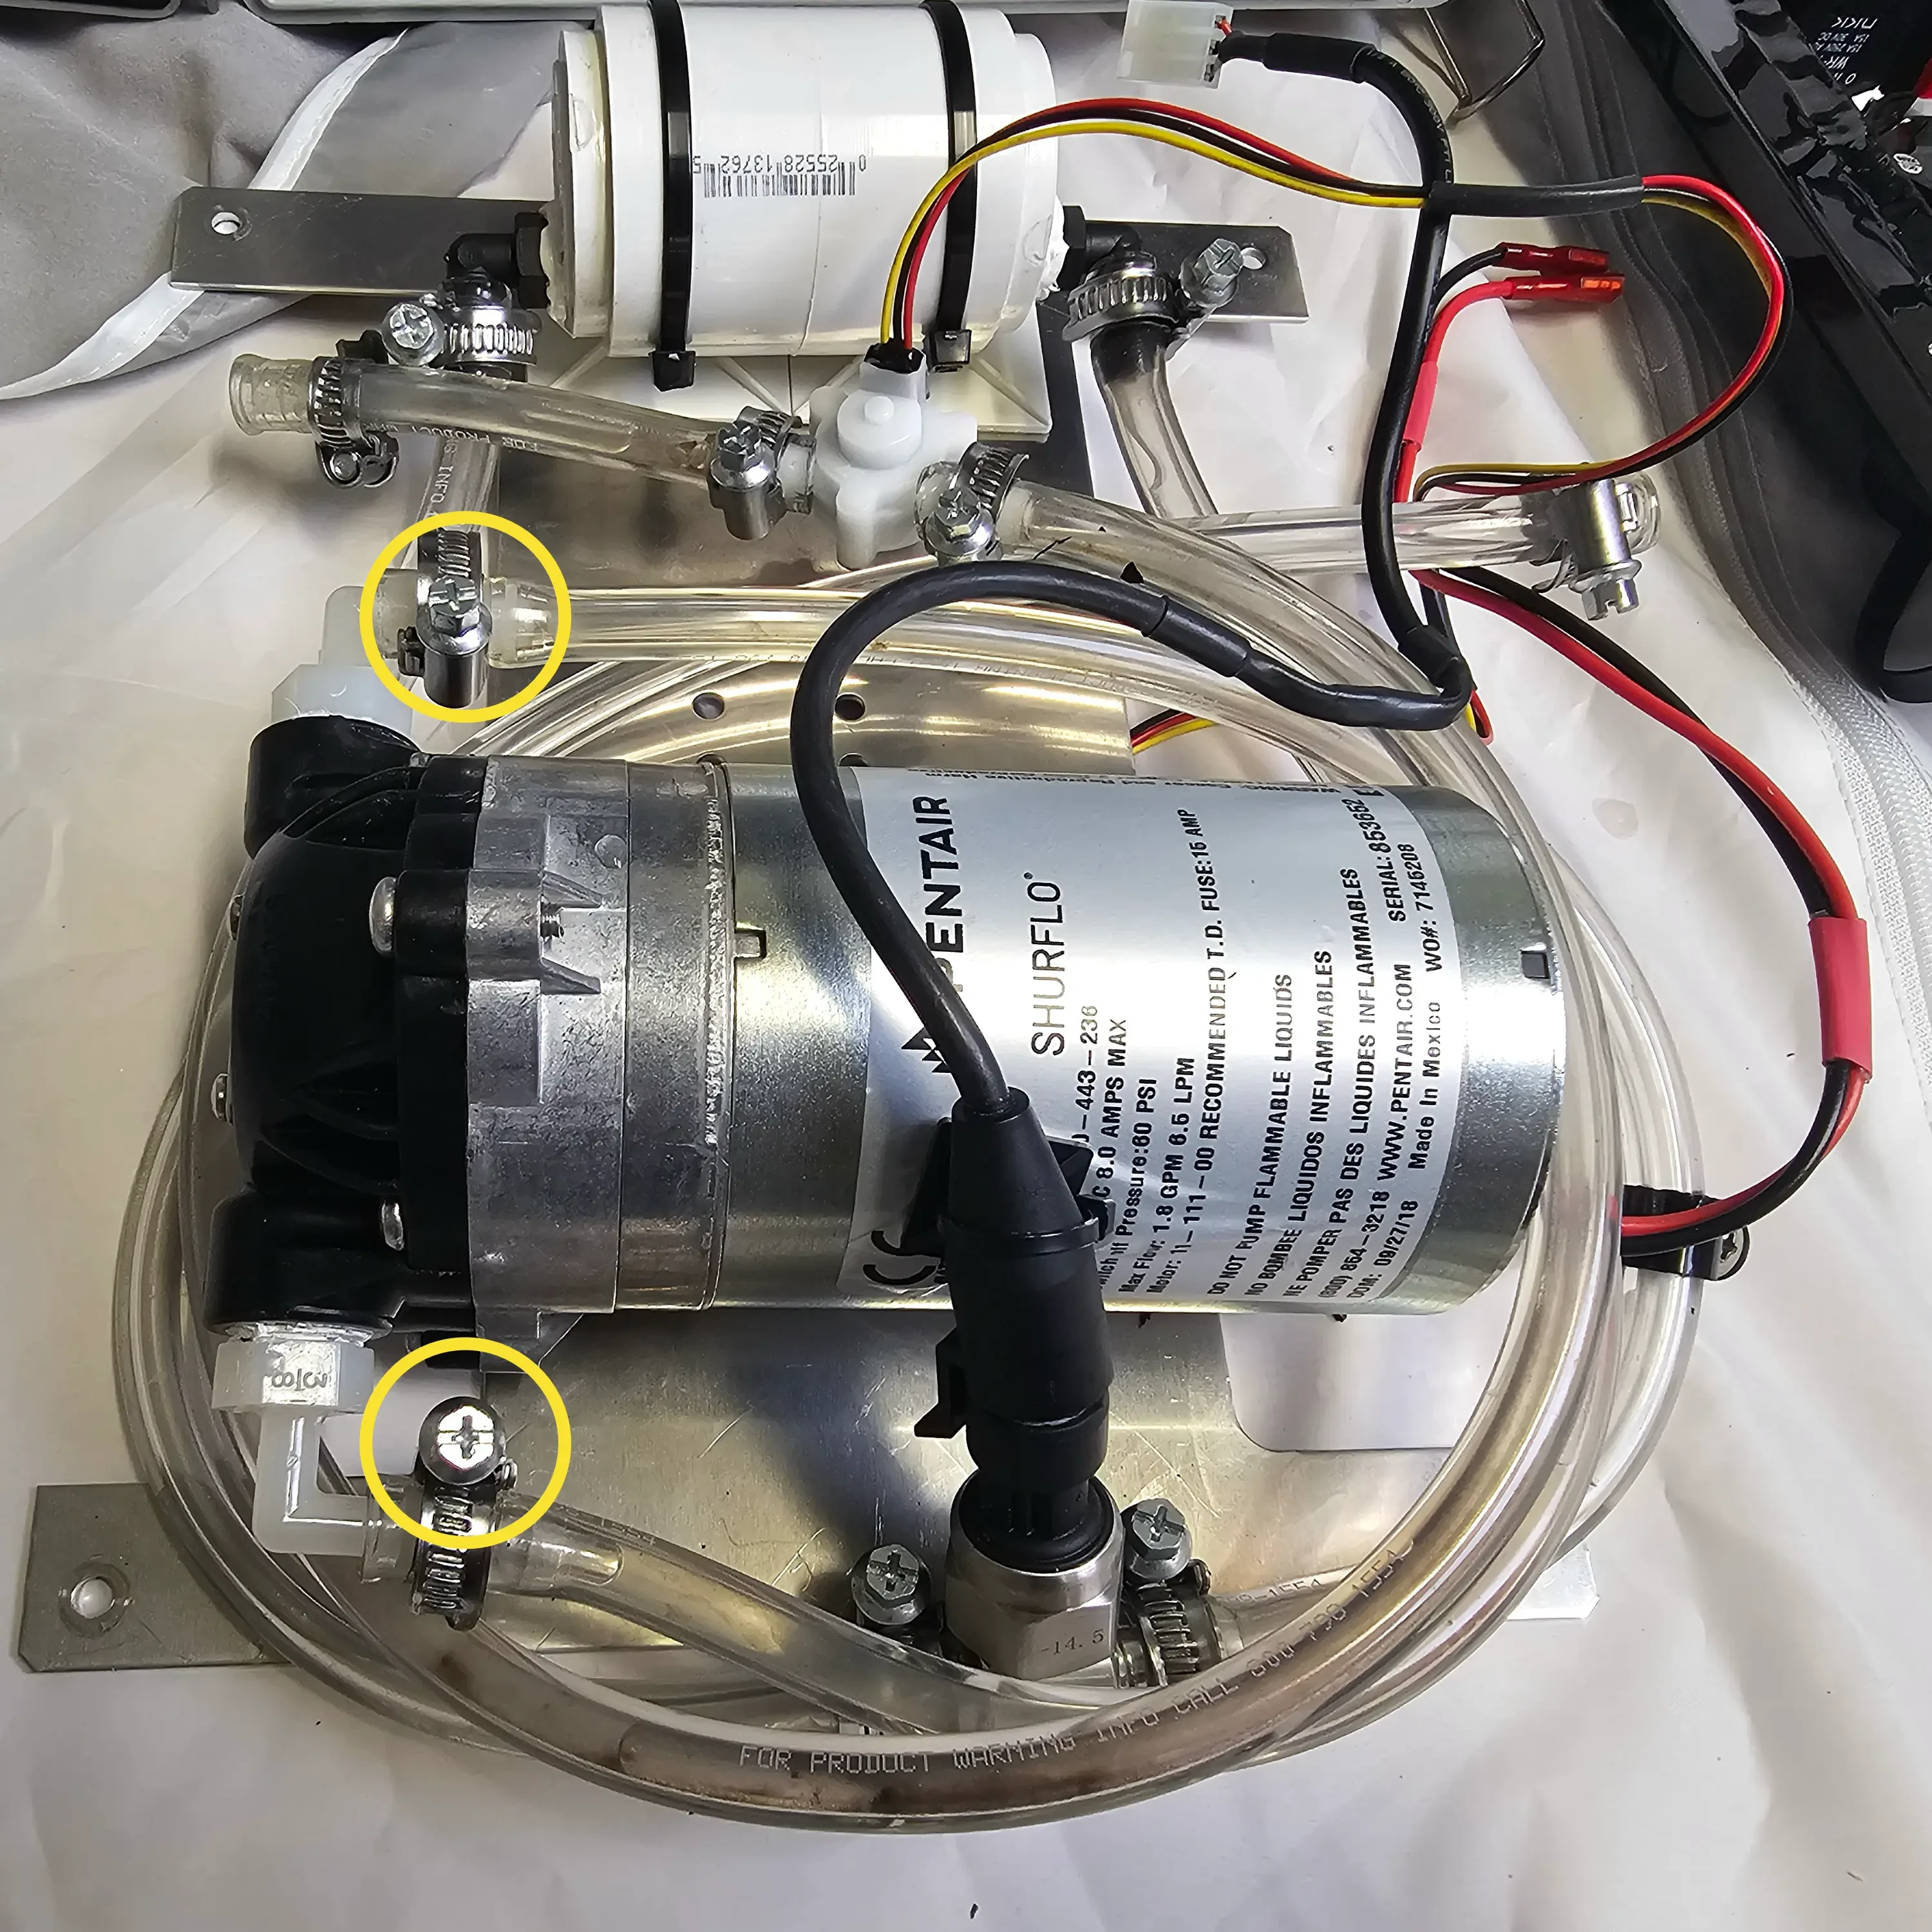
7. Remove Motor: Gently remove the motor and mount assembly from the case. Using a Phillips screwdriver, loosen both hose clamps and remove the hoses attached to the motor.
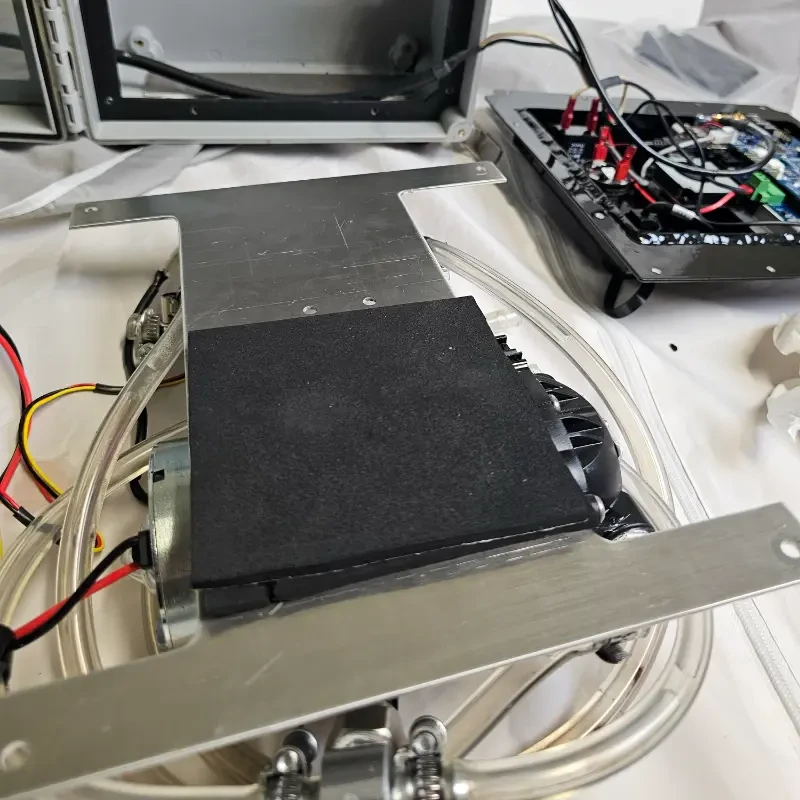
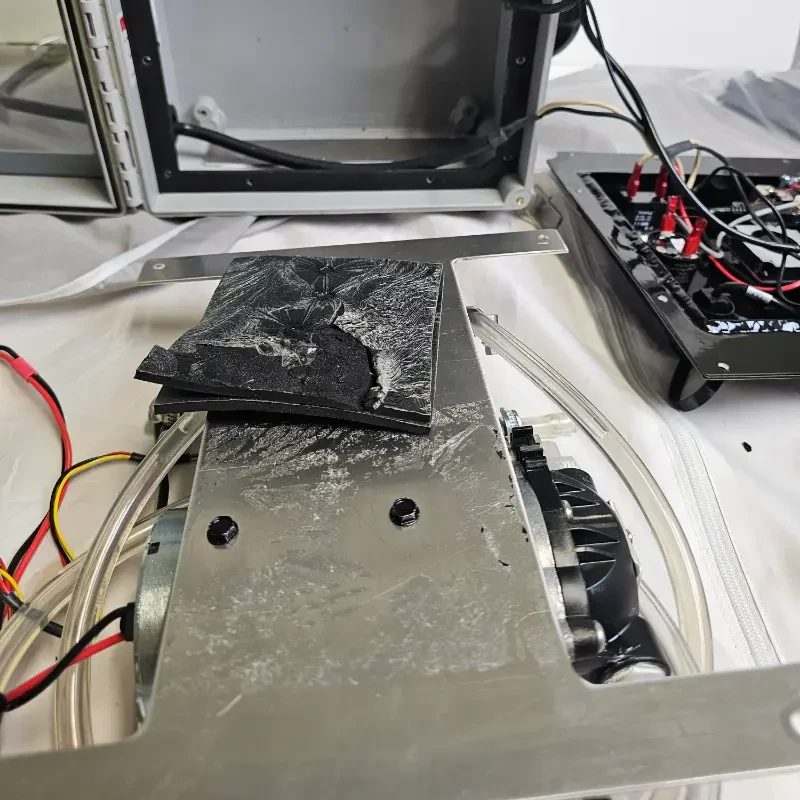
8. Remove Old Motor: On the backside of the motor mount, remove the existing foam pad to expose the mounting bolts. Use a 5/16 inch socket to remove these two black bolts. The old motor is now removed.
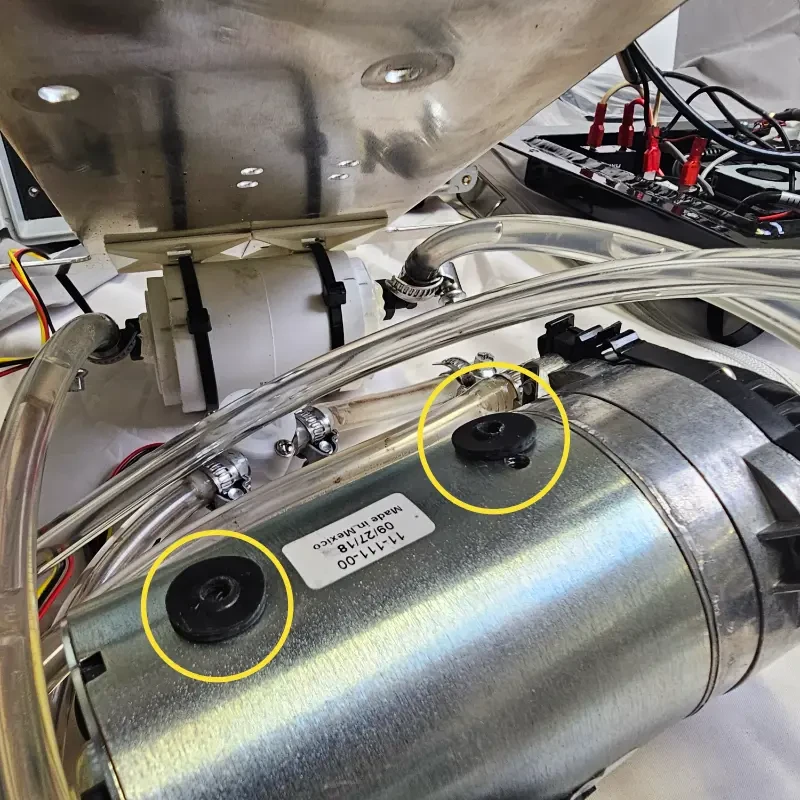
9. Install New Motor: Install the new motor in the same orientation as the original. Secure it to the plate using the hardware from the replacement kit.
* Crucial: Ensure the rubber washers are mounted between the motor and the mount plate. Tighten until snug.
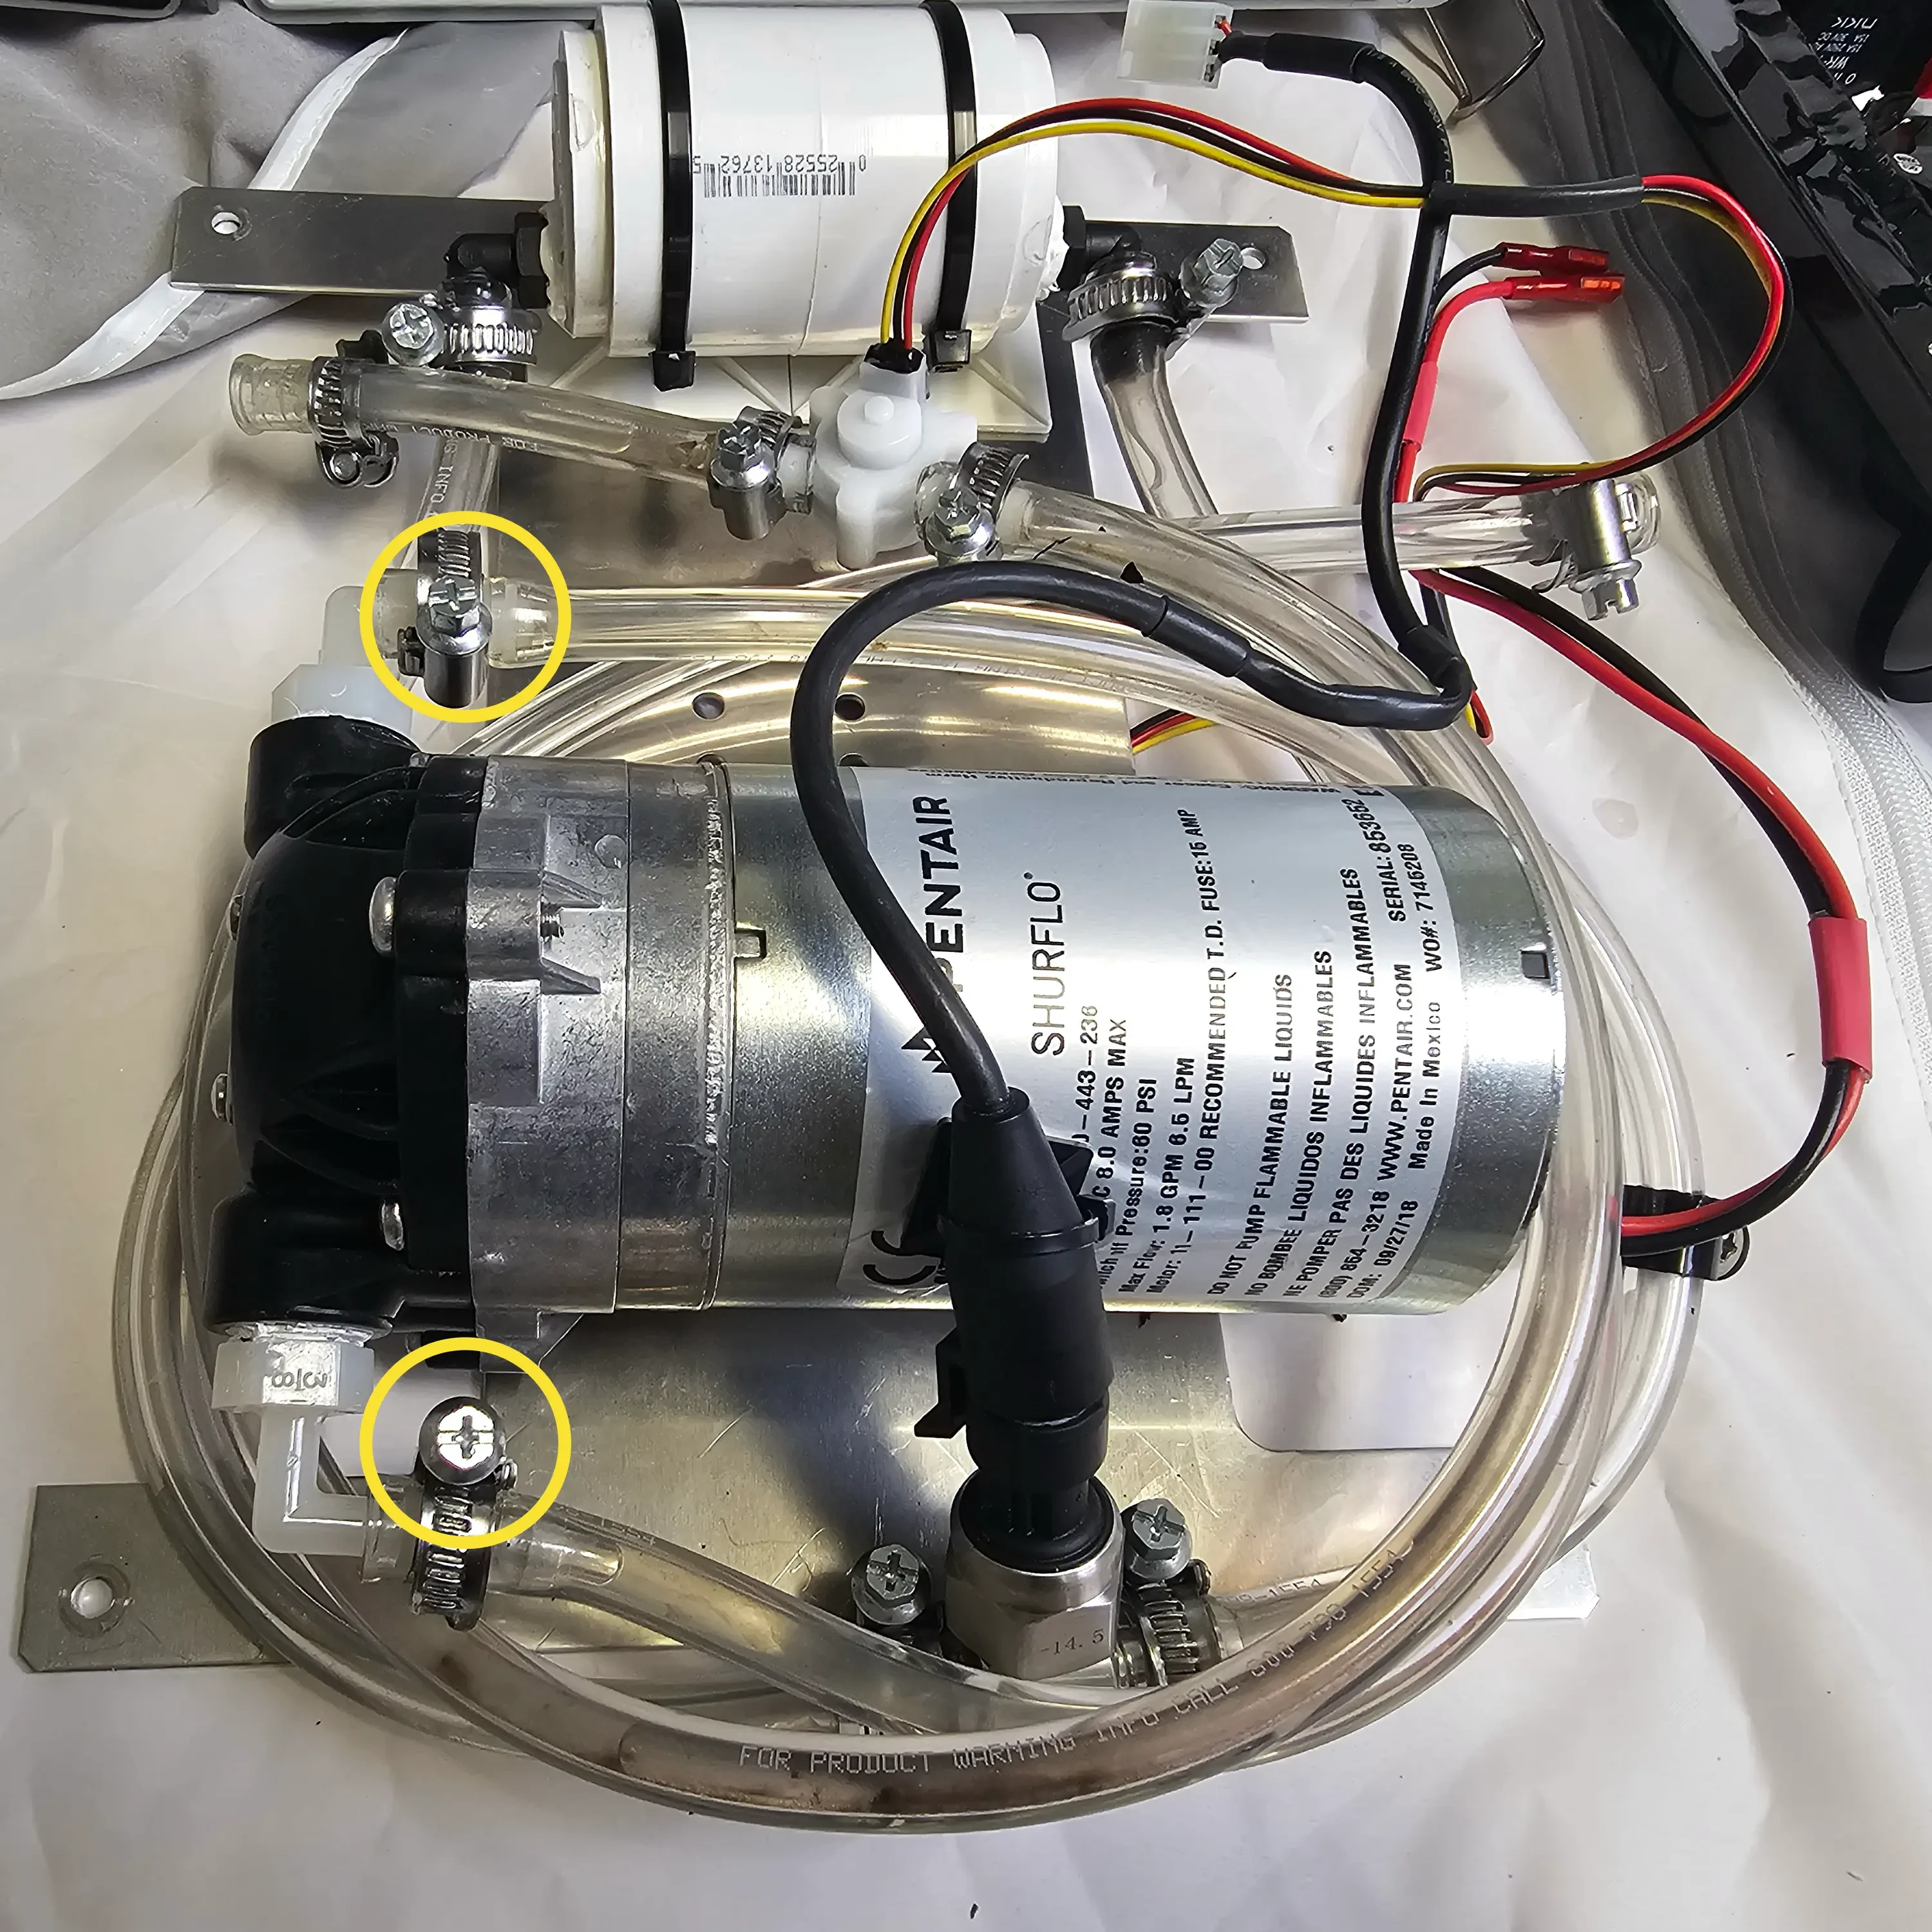
10. Reattach Motor Hoses: Install the hoses back onto the motor barbs and tighten the clamps until snug.
11. Secure Foam: Using the new foam from the replacement kit, peel off the adhesive backing and place it in the same location as the original.
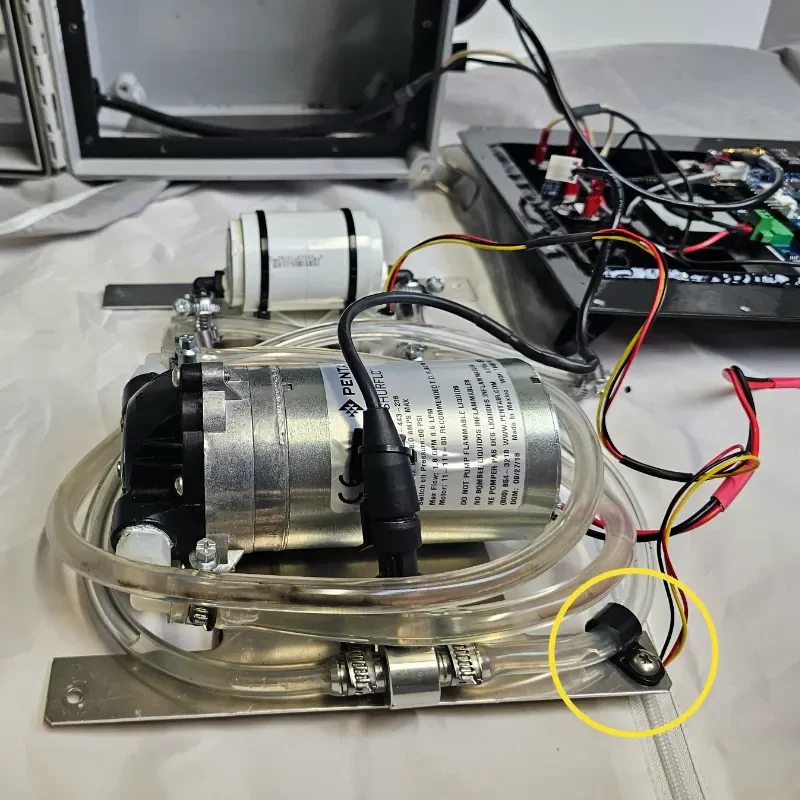
12. Re-mount Assembly: Install the motor assembly back into the enclosure using the four corner screws.
* Note: Ensure the bottom right screw attaches through the hose clamp.
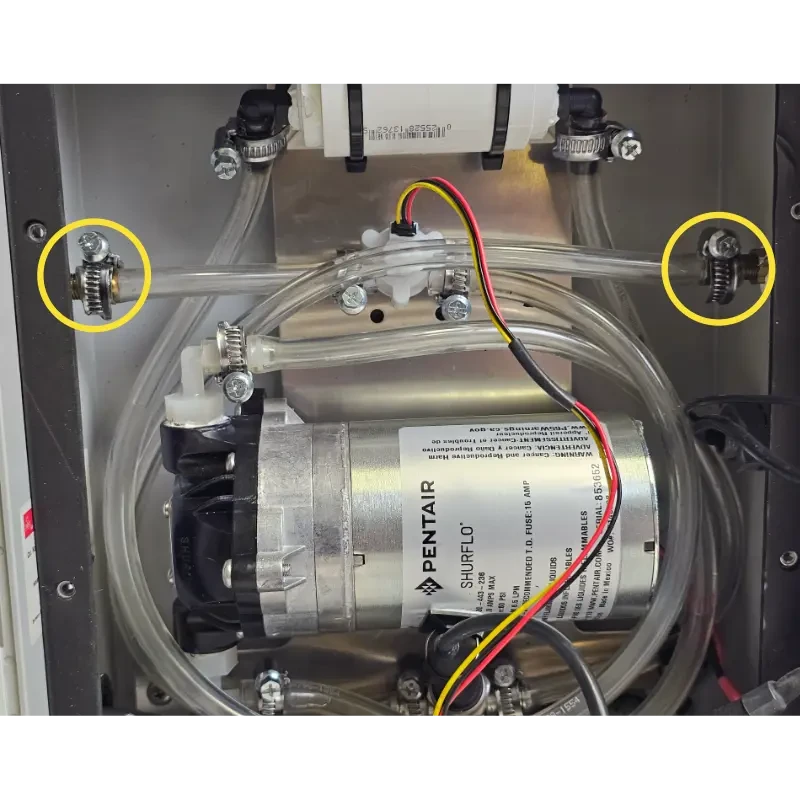
13. Reattach Inlet/Outlet Hoses: Install the inlet and outlet hoses back onto the metal barbs mounted in the enclosure and snug down with clamp fittings.
14. Reconnect Electronics: Reattach the electrical connectors:
* PRESSURE & FLOW: These are keyed and will only fit one way.
* MOTOR: Ensure Red connects to (+) and Black connects to (-).
Before fully closing the unit for permanent use, perform a leak test:
- Attach the battery and power on the unit.
- Run a sample with both inlet and outlet hoses running to a bucket filled with water (ensure the inlet is submerged).
- Verify that all internal connections are leak-free and the unit functions as expected.
15. Close Unit: Reinstall the front face plate and secure it with the 12 Phillips screws.