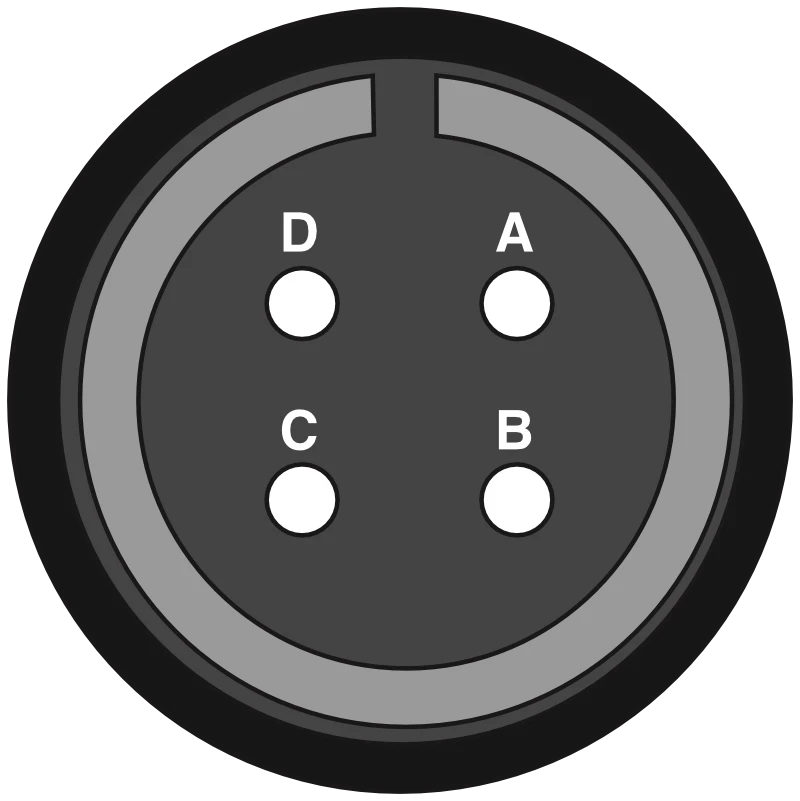
Model 12 and 15 Electrode Pole Testing Guide
This procedure verifies the electrical continuity and switch operation of Model 12 and 15 electrode poles. It checks the pole, connector, and curl cord for open circuits, short circuits, and intermittent connections that could indicate a faulty pole.
Required Tools:
- Ohmmeter
Testing Steps
Disconnect the pole from the electrofisher.
Connect the red ohmmeter lead to pin A in the connector at the end of the curl cord.
Connect the black ohmmeter lead to the anode ring or bottom of the pole.
Set the ohmmeter to the 200-ohm range.
The meter should read near 0 ohms with the pole switch either pressed or released.
- If it does not, the pole fails the test.
- Shake the curl cord while observing the meter.
- If the reading changes, the pole fails the test.
Connect the red ohmmeter lead to pin B in the pole connector.
Connect the black ohmmeter lead to pin C in the pole connector.
With the pole switch released, the meter should read infinite resistance.
- If it does not, the pole fails the test.
- Shake the curl cord while observing the meter.
- If the reading changes, the pole fails the test.
- Press the pole switch. The meter should read near 0 ohms.
- If it does not, the pole fails the test.
- Shake the curl cord while observing the meter.
- If the reading changes, the pole fails the test.
Test between each connector pin (A-D) and the metal shell.
- The meter should read infinite resistance.
- If it does not, the pole fails the test.