Apex Electrofisher Control Box Removal
Before removing the Apex Electrofisher control box from your custom Smith-Root electrofishing boat, you must access terminal strips 0 and 1 (see Step 6) inside the console.
Tools Needed
- 7/16 inch socket wrench or nut driver
- 5/16 inch wrench
- 1/8 inch Allen wrench
- Phillips screwdriver
Removal
To open the console and access the boat’s internal wiring, please use the following steps.
Opening The Console
Follow the steps below to open the console, remove the Apex Electrofisher, and return to Smith-Root for service.
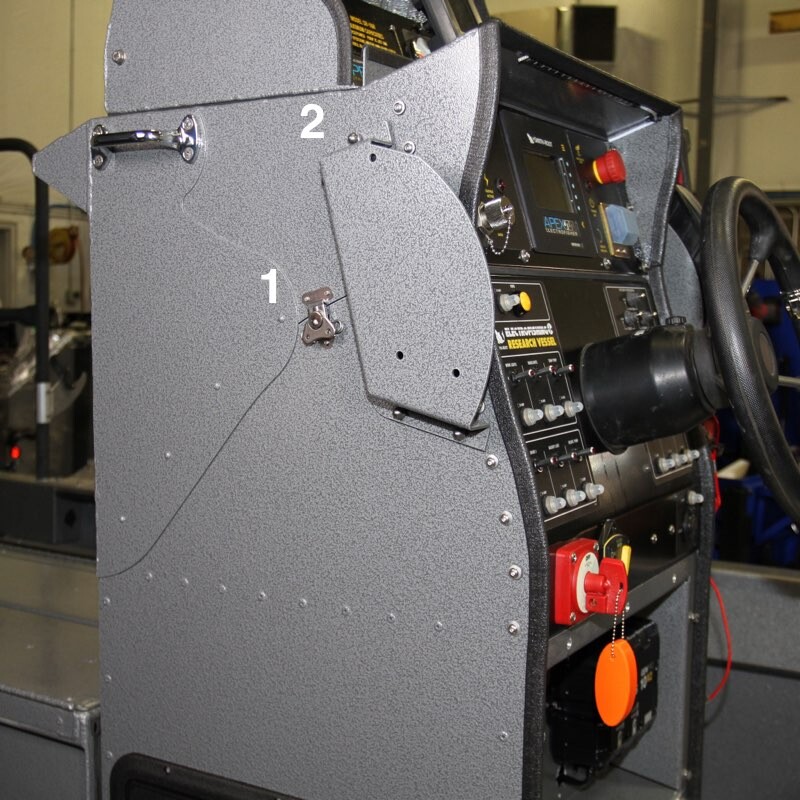
1. On each side, the console is held closed by means of a latch (1) and two acorn nuts on the top of the throttle mount bracket (2) (there is a bracket on each side regardless of which side the throttle is on).
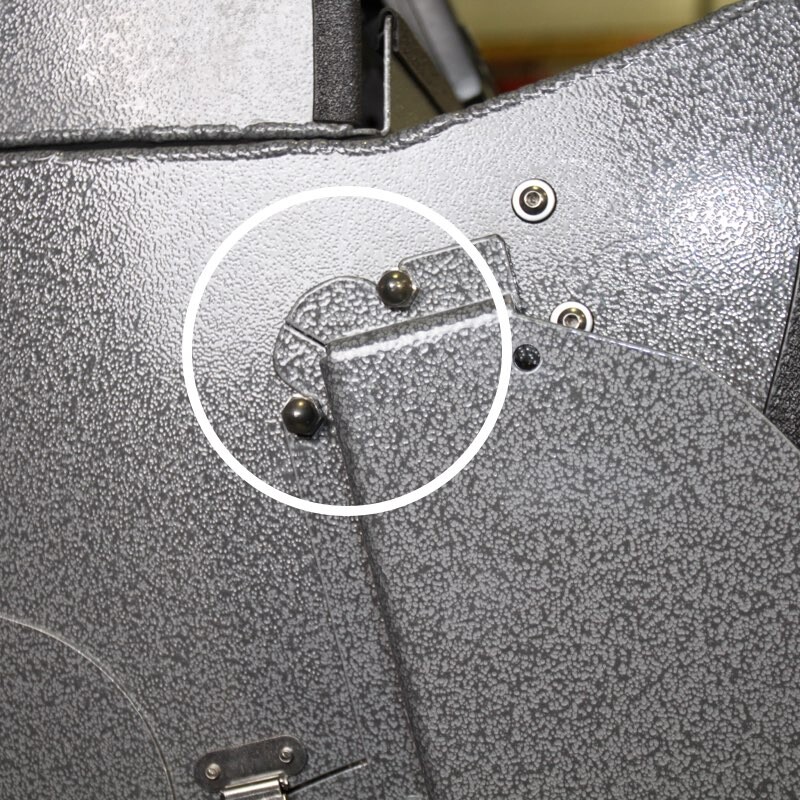
2. Using the 7/16 inch socket (or nut driver), loosen the two acorn nuts. Repeat procedure on the other side of the console.
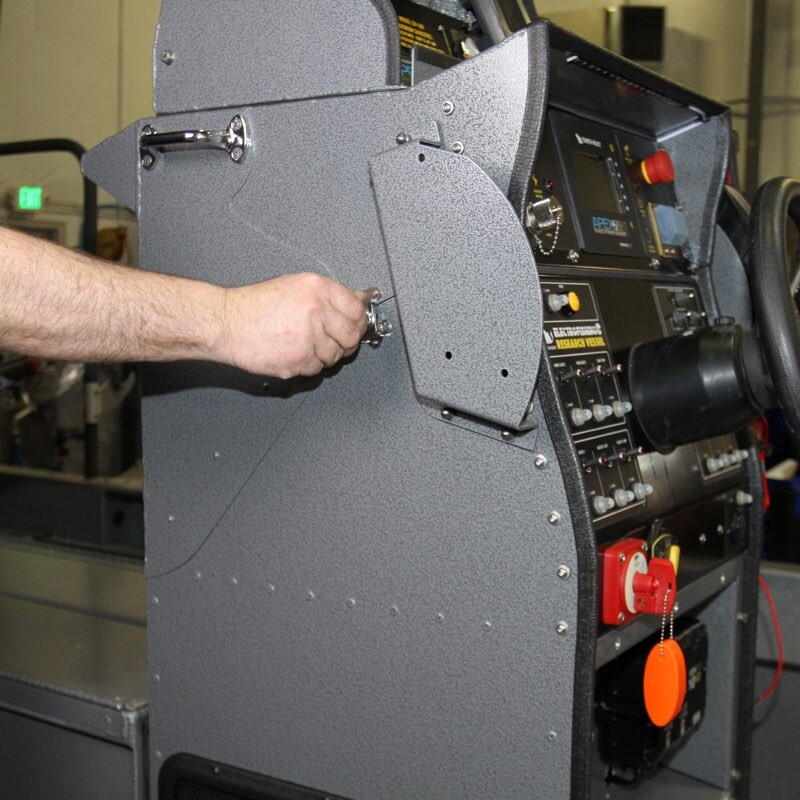
3. Unfasten the latch by twisting handle counterclockwise and pivot latch off of hasp. Repeat on the other side.
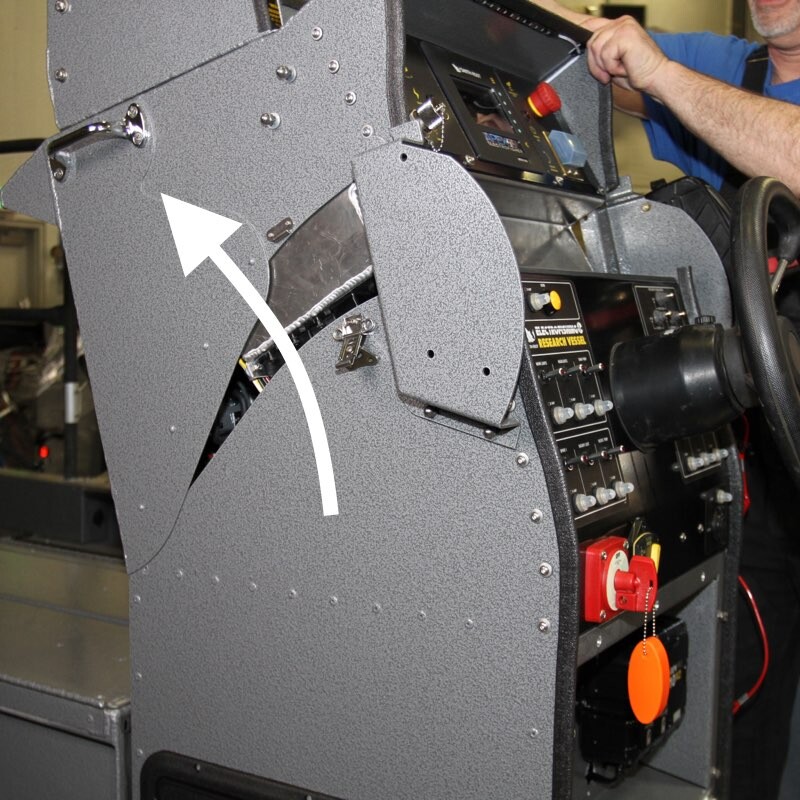
4. Carefully pivot console top forward so that it rests on the livewell. It’s recommended that you have a person on each side to prevent damage to the console front or the livewell, as the console top is very heavy.

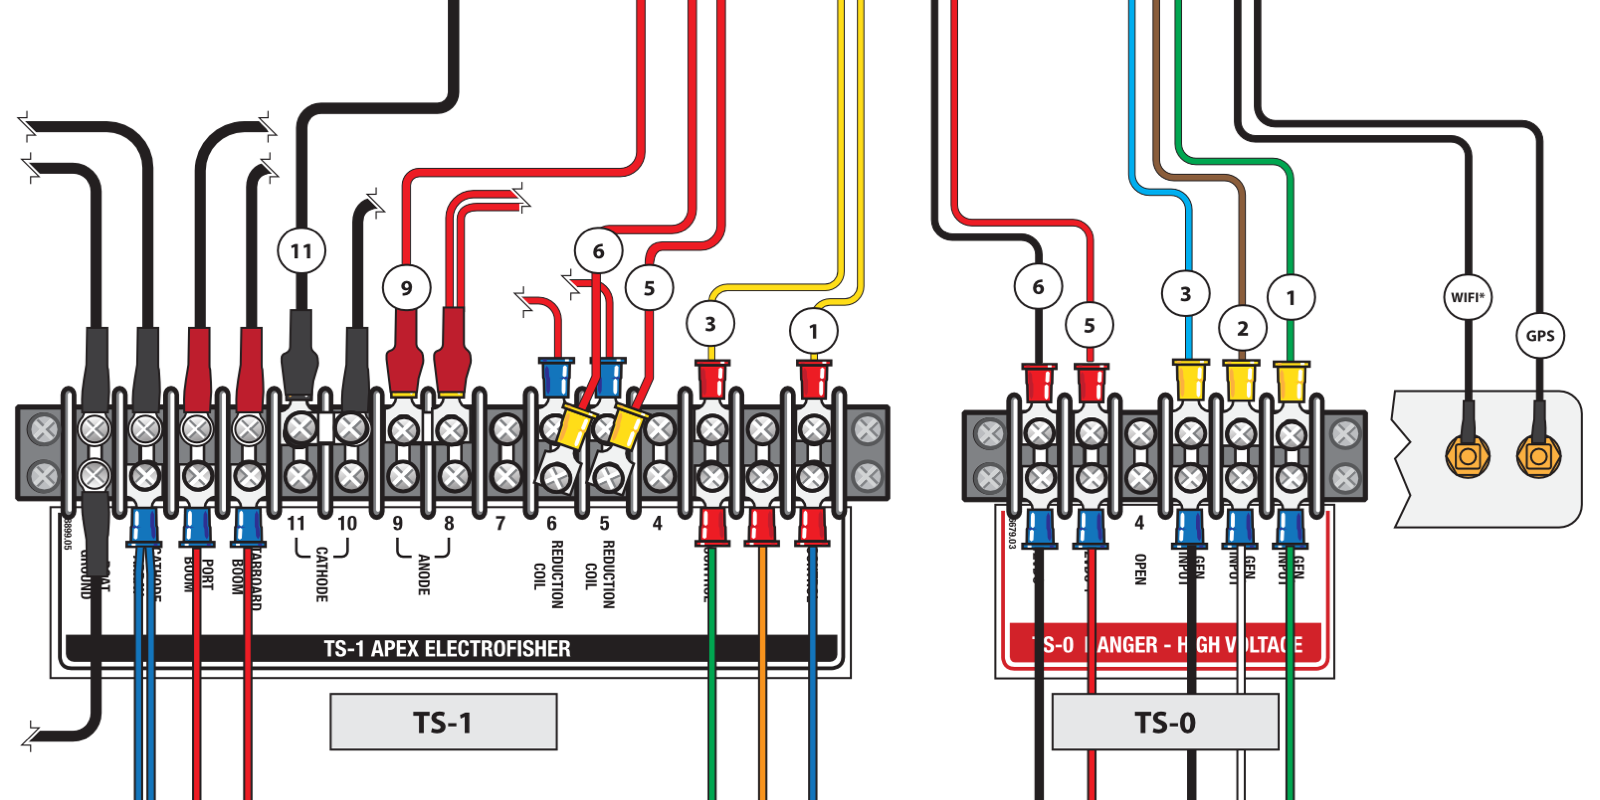
5. Once you have accessed the inside of the console, locate terminal strips 0 and 1 and carefully detach the wires from the Apex box by following the steps indicated in Step 6.
TS-1 terminals: 11, 9, 6, 5, 3, & 1;
TS-0 terminals: 6, 5, 3, 2, 1; WIFI (*optional), GPS (use 5/16 inch wrench - DO NOT USE PLIERS)
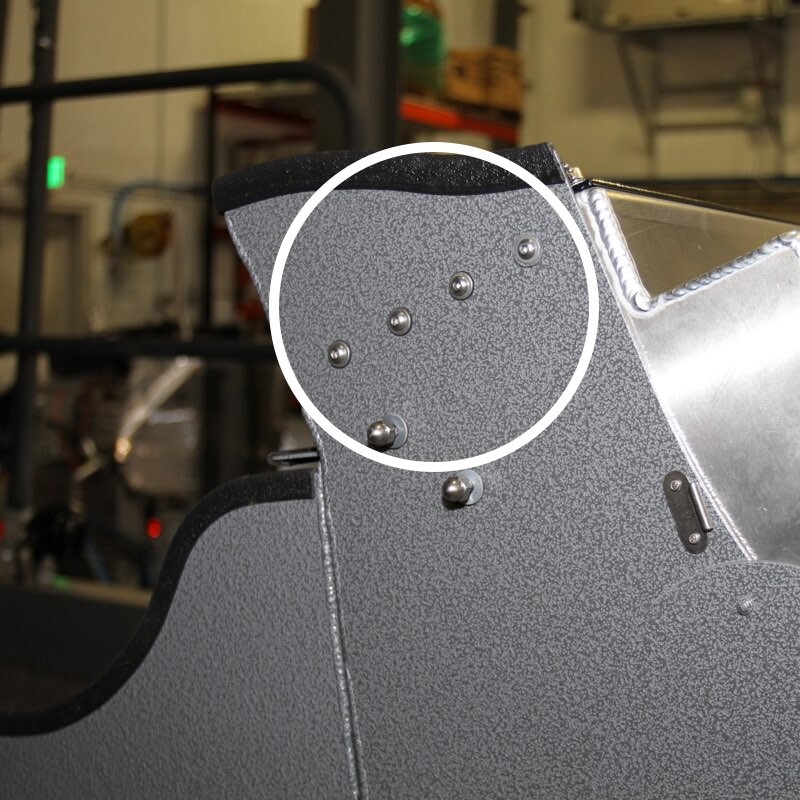
7. Locate the row of 4 Allen screws on either side of the console top and remove them using a 1/8 inch Allen wrench. Carefully set the screws aside. Repeat procedure on the other side.
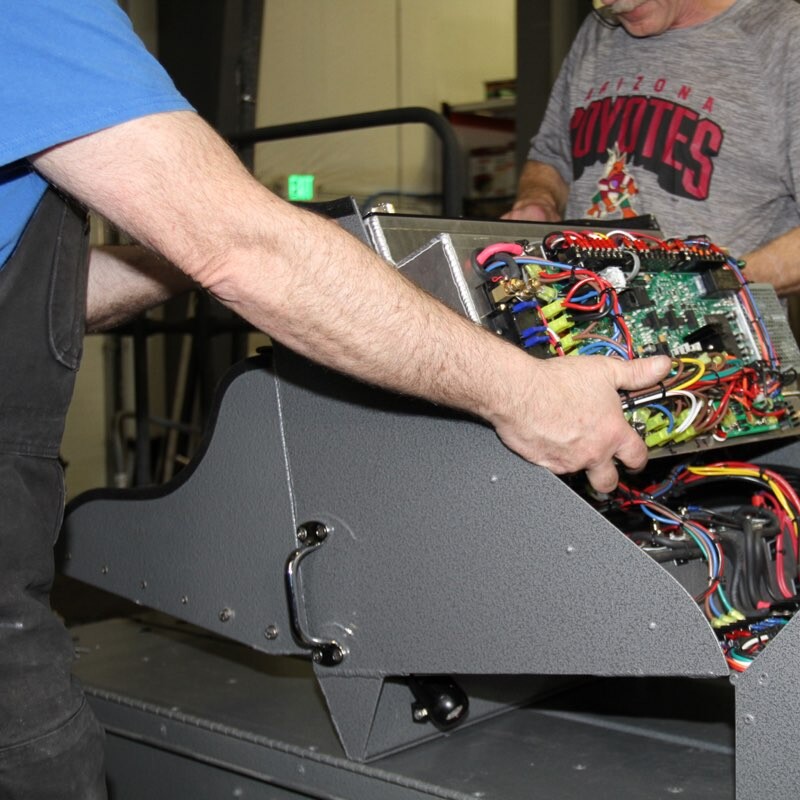
8. Once the screws holding the Apex Electrofisher control box are removed, it’s advisable to have someone on each side of the unit supporting it as it’s quite heavy and may want to slip down into the forward section of the console top.
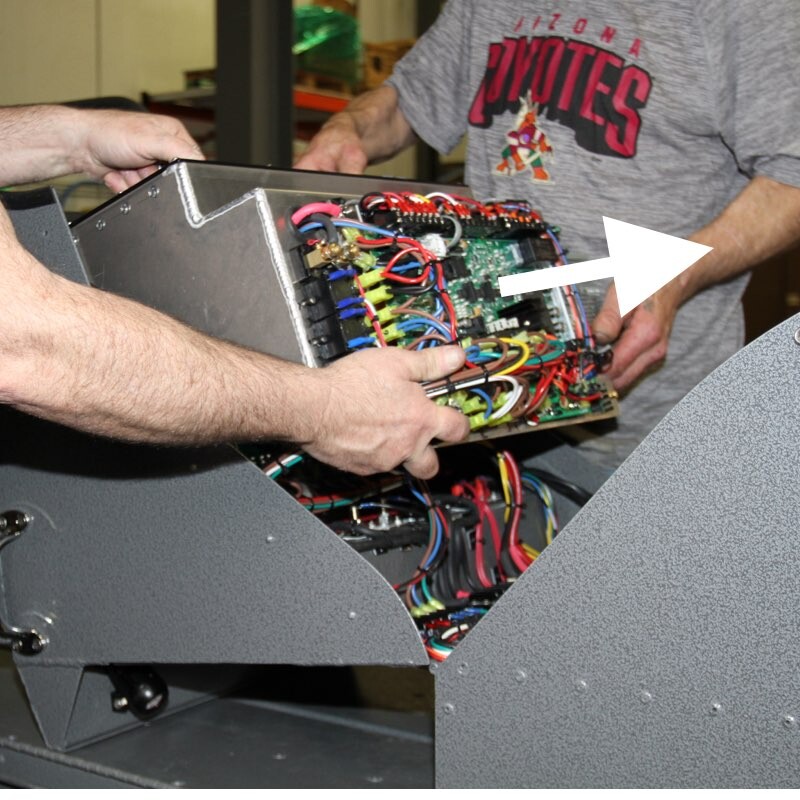
9. Pull the Apex Electrofisher control box straight out towards the rear of the boat in order to pull it clear of connected items such as the GPS unit, tachometer connectors, etc. Take unit out of boat console and carefully put it aside on one end, taking care to avoid putting weight on exposed circuit board and connectors.
Packing and Shipping Instructions
10. Pack the unit with bubble wrap or similar packing material. Place wrapped item inside plastic bag to keep packing material (peanuts, etc) from lodging in the equipment. Place bagged item inside a carton with a minimum of 3 inches on each side and top and bottom of unit and fill with packing material. Item should not be able to shift around inside carton. Failure to observe these packing procedures will likely result in damage to unit in transit.
11. Fill out the Equipment Repair Authorization form and include a printed copy of the submitted form in the package. The shipping address is included in the form.